The scheduling process is flexible and easy, offering the ability to deliver reports via email in HTML format, attached in a document (e.g., PDF, Word, Excel, CSV) or offering a link to the report in the archive directory on the server.
Scheduling reports is typically a two step process; 1) specification of when the report is scheduled to run and 2) identification of who should receive it (subscribers). From the Reports list page, the first time the Schedule action is invoked the user can create the schedule. After a schedule has been created, the Schedule action must be invoked a second time to get the list of schedules for the report and subscribe users to the report.
|
Note: |
|
Dashboards may not be scheduled. |
|
Hint: |
|
Contact the system administrator about being able to schedule reports. |
To schedule a report, hover the mouse over the ![]() icon
and select Schedule from the dropdown list.
icon
and select Schedule from the dropdown list.
If a schedule already exists for the report, the Schedules page will be presented.
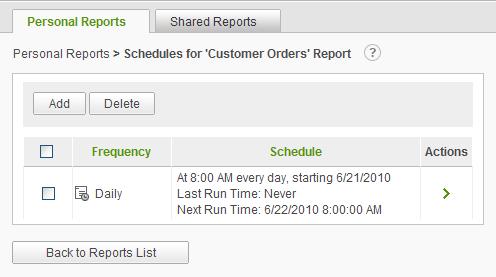
Click on the Add button to create a new schedule for the report.
Click on the Delete button to remove selected schedules for the report. Schedules may be selected by clicking on the checkbox adjacent to the schedule(s).
The Schedules list may be sorted by clicking on the Frequency or Schedule column headers.
The three actions available for a schedule are Modify Schedule, Change Subscription and Run Schedule. The Run Schedule option will not be presented until subscribers have been added to the schedule or if the report has expired.
Hover the mouse over the ![]() icon and select the appropriate
action from the dropdown list.
icon and select the appropriate
action from the dropdown list.
Some or all of the following options are available when scheduling a new report:
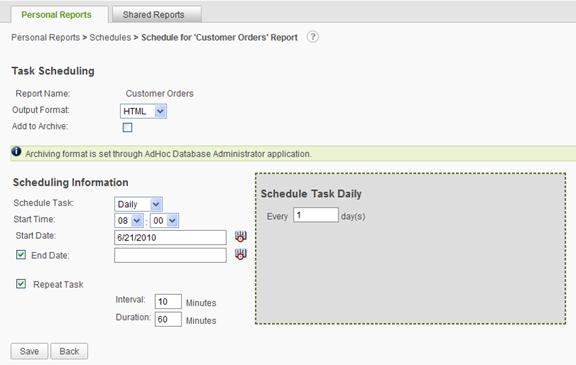
The Output Format determines how the report is delivered in the email. HTML reports are embedded in the email and PDF, Word, Excel and CSV reports are sent as attachments.
Reports can be added to the archive whenever the scheduler delivers the report. If the report is added to the archive, the email contains a link to the directory containing the archives. The report is not embedded or sent as an attachment but rather saved to the archive directory.
The Add to Archive checkbox is only visible when archiving is enabled by the System Administrator. If the Add to Archive checkbox is selected, the Output Format will be set to the default archive format specified by the System Administrator and the Output Format list will be disabled.
The following options are presented in the Schedule Task list (with the default set to Daily):
As these options are selected, the subordinate gray dialog will either be hidden or present options pertinent to the scheduling option selected. If Once is selected, the gray dialog is hidden. Following are the respective dialogs:

The Start Time specified determines the time when the scheduler will run the report. The hour and minute options are presented as drop-down lists.
The Start Date specified determines the initial date
when the scheduler will run the report. The date may be manually keyed in or
populated from the calendar control by clicking on the ![]() icon.
icon.
The End Date checkbox allows the user to let the report run indefinitely if unchecked. If the option is checked, the option to specify a date to terminate report execution is presented. Specification of the End Date is identical to the process for the Start Date.
The Repeat Task option allows a report to be run repeatedly, beginning at the Start Time and Start Date specified earlier. If the Repeat Task option is exercised, the Interval and Duration for running the report may be specified. The Interval determines the frequency and the Duration determines for how long . Both values must be greater than 0, and the Interval value must be less than the Duration value.
The initial scheduling page presented was for a report that did not require any user input. Following is a schedule page for a report that expects user input when it is run:
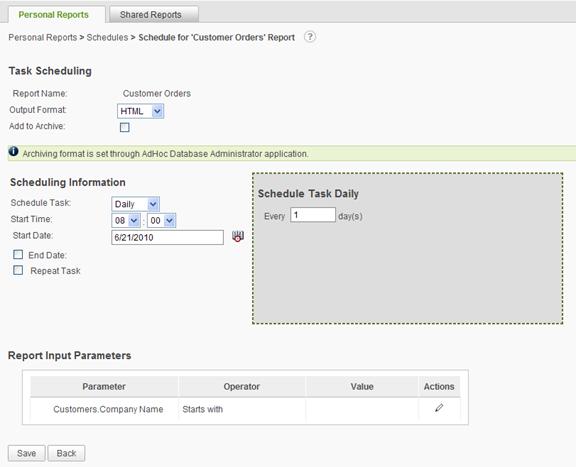
Since a scheduled report is run unattended , parameter values that would normally be supplied by the user (called Ask parameters) must be set at the time of scheduling. The scheduling page is adjusted to allow the specification of the parameter values to be used when the scheduled report is run. Notice at the bottom of the schedule page a section labeled Report Input Parameters is presented.
Reports may have multiple parameters defined. Every
parameter requiring user input must have values set. To set the values for a
parameter, click on the ![]() icon and a Parameter Details
dialog will be presented.
icon and a Parameter Details
dialog will be presented.
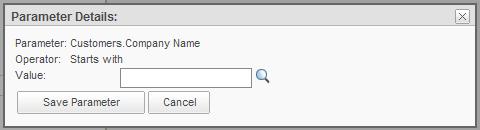
Clicking on the helper icons such as the ![]() and
and ![]() (when
the parameter is date-based) may assist in selecting the values. Click on the Save
Parameter button to save the values to be used for the associated parameter
when the report is run.
(when
the parameter is date-based) may assist in selecting the values. Click on the Save
Parameter button to save the values to be used for the associated parameter
when the report is run.
When the scheduling options have been completed, click on the Save button at the bottom of the page to save the information and create the scheduled task.
If the Subscribed Users list is not present, then no users have elected to receive the report.
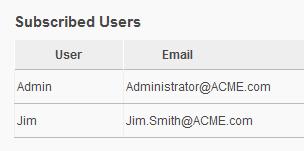
Subscribed users are listed at the bottom of the webpage.
|
Hint: |
|
Test that the scheduled report is delivered as expected by first subscribing yourself and then running the report from the Scheduled Reports grid. The speed of delivery depends on the size of the report and the local network configuration. |