Fields
| Field Name |
Definition |
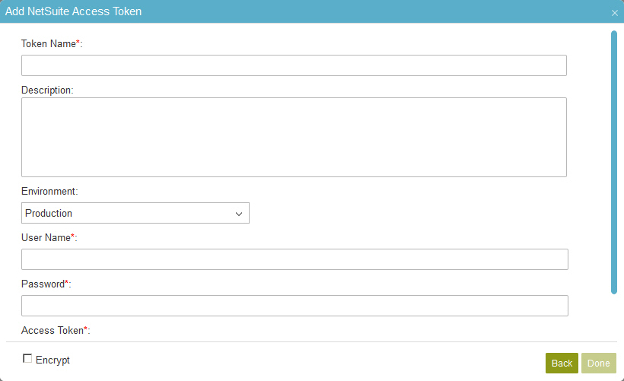
Access Token Name
|
- Function:
- Specifies the unique name for your connection to NetSuite.
- Accepted Values:
- A text string that can include letters, numbers, and spaces
- Default Value:
- None
|
Description
|
- Function:
- A description for your access token.
- Accepted Values:
- More than one line of text.
- Default Value:
- None
|
Environment
|
- Function:
- Specifies if your environment is for development or production.
- Accepted Values:
-
- Production - The environment uses to contain the production data.
- Sandbox - The environment uses to create and test your applications.
- Default Value:
- Production
|
User Name
|
- Function:
- Specifies the user name for database authentication.
- Accepted Values:
- A valid user name.
- Default Value:
- None
- Accepts Process Data Variables:
- No
|
Password
|
- Function:
- The password for the authentication account.
- Accepted Values:
- A valid password.
- Default Value:
- None
- Accepts Process Data Variables:
- No
|
Access Token
|
- Function:
- Specifies an access token, or code, supplied by NetSuite.
- Accepted Values:
- A valid access token
- Default Value:
- None
|
Test Connection
|
- Function:
- Makes sure the specified database account is correct.
|
Encrypt
|
- Function:
- Holds the access token in the AgilePoint database as encrypted data.
- Accepted Values:
- Deselected - The access token is in plain text in the database.
- Selected - The access token is encrypted in the database.
- Default Value:
- Deselected
|
 > Global Access Tokens.
 .
.